Table of Contents
Compare different preparation protocols
Analysis description
In this tutorial, we will work with two biological replicates (named “Replicate1” and “Replicate2”).
Each replicate is aliquoted in three parts and we realize a different preparation protocol for each part (“Ultrafiltration”, “Proteominer” and “TCA Precipitation”).
Each aliquote is then deposed onto a SDS-Page gel.
When separating is done, bands of interest are extracted from the gel and analysed using the EDyP laboratory analysis pipeline:
HPLC-MSMS → Mascot(protein identification) → IRMa(validation) → MSI database(store valid identification results)
Each gel band will result into one identification result (named “F093496.dat” for example). Then, the analysis of a whole aliquote will generate many identification results.
In the next sections, we will see how to exploit the identification results stored in the MSIdb.
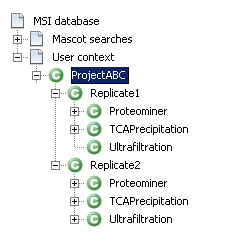
...Project ABC
  ...Replicate1
      .Ultrafiltration
         .F093496.dat
         .F093497.dat
         ...
      .Proteominer
         ...
      .TCA Precipitation
         ...

  ...Replicate2
     .Ultrafiltration
         ...
     .Proteominer
         ...
     .TCA Precipitation
         ...
Project creation in hEIDI
Please follow the steps in the getting start to setup the MSI db connection (Mass Spectrometer Identification database), create an hEIDI project and open a working session on the MSI db.
Check the filter parameters used in identification results
A set of properties are accessible for each identification and can be displayed or used to filter the list.
This is specifically useful to check that same filter parameters were used for all identification results validation.
Structure your experiment as a context tree
 Now you need to build a context hierarchy and dispatch your identification results to map the experiment described in the first section.
See the following links to know what is a context and how to create a context hierarchy.
Execute protein grouping for every contexts
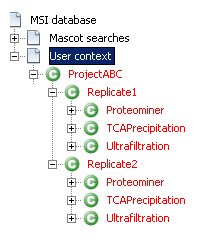
 Contexts representing preparation protocol compile a number of identifications results. A same protein may be present in several identifications. So, the first step is to suppress this redundancy by grouping proteins at the context level. Execute the protein grouping algorithm for all the User contexts in this order:
- Start with the contexts that directly group the identification results: “Ultrafiltration”, “Proteominer” and “TCA Precipitation”. Do that for the two replicates.
- Then continue with the contexts “Replicate1” and “Replicate2”.
- And finally, end with the root context named “ProjectABC”
If everything has worked correctly, all the context names are now in red.
Browse the context tree and export it
Check reproducibility of results
You may want to compare results from the same preparation protocol in the two replicates.
Compare two contexts with each other and export comparison results
 a deplacer
How to compare contexts each other.
See the following link to understand what is context comparison.
Export comparison results.
Find the optimal preparation protocol
You may want to compare protocols each other for a given replicate to find the “best” one.
Compare a parent context with their child contexts and export comparison results
 a deplacer
  How to compare a context with its children.
Show covering diagram
Export comparison results.
See the following link to understand what is context comparison.

