This is an old revision of the document!
Table of Contents
How to export a UserContext into the PRIDE XML Format
Warning:
 Exporting a UserContext to PRIDE XML format is only available for MSIdb version D.4 (or later versions).
 - In the current hEIDI version (v1.10.1 / MSIdb E.1), the
headerof the generated PRIDE XML file is not totally achieved (contact info, experiment & sample details, protocol steps, etc.). The user will have to use PRIDE Converter to build another PRIDE XML file, from which he will only copy the meta-infos and paste them into the hEIDI generated PRIDE XML file.
Note:
- Only typical proteins of each protein group will be exported
Main steps to export a UserContext to PRIDE XML format
- From a UserContext in hEIDI, launch the PRIDE XML Export to create a first PRIDE XML file (see details below)
- From the PRIDE Converter wizard, create a second PRIDE XML file (see here)
- Copy the
headerfrom the second PRIDE XML file and paste it into the first PRIDE XML file (see below) - Check your modified PRIDE XML file using PRIDE Inspector
1. Launch PRIDE XML Export from hEIDI
Follow these steps to generate a PRIDE XML file from a given context: 
- After having created or opened an hEIDI project, open your MSI session but Don't forget to activate your hEIDI project.
- Check the
runDescriptor.propertiesfile exists in your hEIDI project (see next section) - Select the Context you want to export. For a User Context, it has to be grouped and saved to MSIdb.
- Select
MS Identifications > Context > Export > PRIDE XML - Enter a name for your PRIDE XML file and browse to the directory of your choice (default is to use the name of the selected UserContext with the .xml extension in the hEIDI project directory).
- [Optional] A dialog may appear if spectra are missing
- Answer
Noif you want to stop the PRIDE XML Export process (you will then need to populate the MSIdb using the SpectrumMatchFeeder tool) - Answer
Yesif you want hEIDI to launch for you the tool to populate MSIdb with missing spectra- Check the Mascot data root path. You can keep the default value (
\\cp-mascot\data) or use the corresponding Drive Letter you have set up in Windows Explorer, for exampleY:. Check, in Windows Explorer, you have mapped a drive to the Mascot data folder (\\cp-mascot\data) and you are connected to that folder. - Click
Ok, populate MSIdb with missing infoto update database - A dialog will appear when MSIdb is populated with missing spectra and ask you to relaunch PRIDE XML Export.
- If PRIDE XML Export ended successfully, a dialog message is displayed at the end of the export process
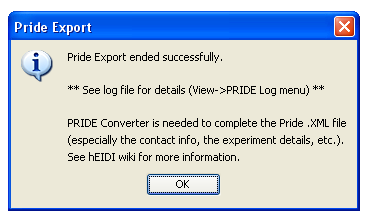

![]() Open the resulting .xml Pride file out of hEIDI using any external text editor. Opening the file in the hEIDI environment may cause memory issue if the file size is too big
Open the resulting .xml Pride file out of hEIDI using any external text editor. Opening the file in the hEIDI environment may cause memory issue if the file size is too big
The ''runDescriptor.properties'' file
In the runDescriptor.properties file you provide meta information about your experiment (title, description, contact info), your sample(s), the instrument, the protocol steps, etc.
The PRIDE XML Export fonctionnality will then parse properties from the runDescriptor.properties file and create the appropriate header in the resulting XML file.
![]() Warning
Warning ![]()
- This feature is in progress, so we highky recommand to use the PRIDE Converter instead of using ''runDescriptor.properties'' file, in order to easily create a full detailled header for your PRIDE XML file. Nevertheless, if you want to learn more about using the
runDescriptor.propertiesfile, click here for more details about filling in this file)
When you create a new hEIDI project, a default runDescriptor.properties file is created.
Warning about reusing old hEIDI Project
![]() If you use an old hEIDI project (created with hEIDI version lower than v1.10.1), check:
If you use an old hEIDI project (created with hEIDI version lower than v1.10.1), check:
- A
runDescriptor.propertiesfile exists under<HEIDI_PROJECT_DIR>\heidi.project\. If it doesn't exist, simply create an empty text file, namedrunDescriptor.properties
How to modify the ''runDescriptor.properties'' file in hEIDI
- On the left side of the hEIDI interface, select the
Filestab (or select in the main menu barWindow→Files) - Expand the node corresponding to the hEIDI project you are working on. Finally, expand the
heidi.projectdirectory. - Double-click on the
runDescriptor.propertiesfile to open it in the hEIDI editor view (you can also right-click on therunDescriptor.propertiesand selectOpen, it will display the contents of this file in a tabular way) - Change the contents of the file
- Don't forget to save your changes by selecting
File→Savein the main menu bar

2. Use PRIDE Converter to create another XML file
See here to create a PRIDE XML file from a MASCOT DAT file.
3. Extract meta-info from PRIDE XML file (generated by PRIDE Converter) to update the PRIDE XML file generated by hEIDI
The purpose is to replace meta-information from the first PRIDE XML file (generated by hEIDI) with the more detailled meta-information of the second PRIDE XML file (generated by PRIDE Converter)

4. Check your PRIDE XML file using PRIDE Inspector
Page Tools
