Table of Contents
Getting Started
This tutorial will show you how to validate a Mascot identification result with IRMa. A sample Mascot result file is available in the download section : result_sample.dat. But the same operation could be executed with any Mascot MS/MS Ion Search result.
Note: The .dat file should not be stored in a directory containing accent or blank.
Step 1 : Run IRMa
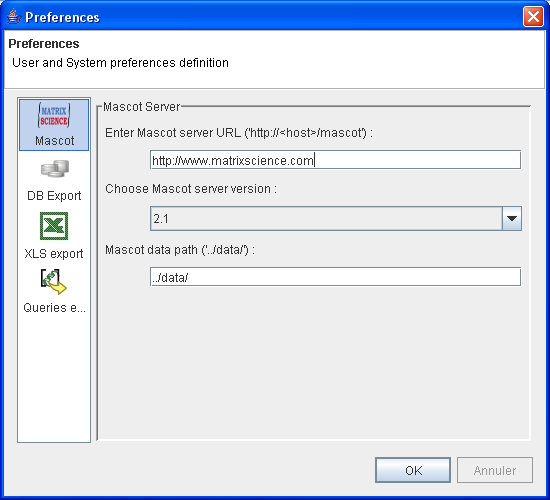
To start IRMa, simply double clic on the batch file run.bat or launch it from the command prompt. If the application didn't start, check your java installation (see Requirements). The first time IRMa is launched, it will ask for some preferences properties. Mandatory values are
- Mascot Server
- Mascot URL : URL of your mascot server. If you don't have a local mascot server, you can use http://www.matrixscience.com/.
- Mascot Server Version : 2.0 and 2.1 data were formated differently. 2.1 could be choose for 2.1 and above version
- Mascot data path : path where result files are saved, specified in Mascot configuration. Default is
../data/and may be right for most installation
Other preferences are not needed to run IRMa and can be changed later.
Step 2 : Open and Parse a result file
Note: The .dat file should not be stored in a directory containing accent or blank.
Select Menu File –> Open –> Mascot Identification. In the open dialog select the result_sample.dat file.
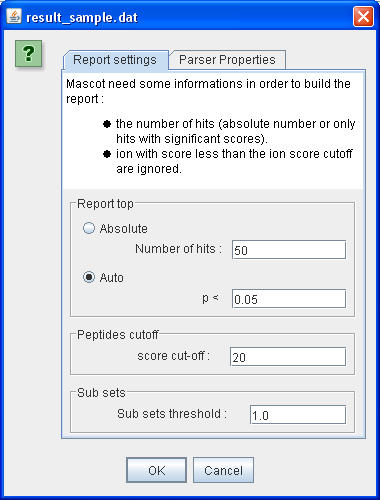
In this first dialog, you must specify the parameters that will be used to generate the result (almost, the same parameters as those proposed on mascot server result view):
- Report Settings
- Report top (absolute or auto) : select Auto with p value < 0.05
- peptides cut-off : score = 20
- subsets threshold = 1, to consider all sub sets
- Parser Properties
- Select “Never read sequence” (The result has been generated on our mascot server, so it sequence can't be retrieve in this case !)
Step 3 : Filter results
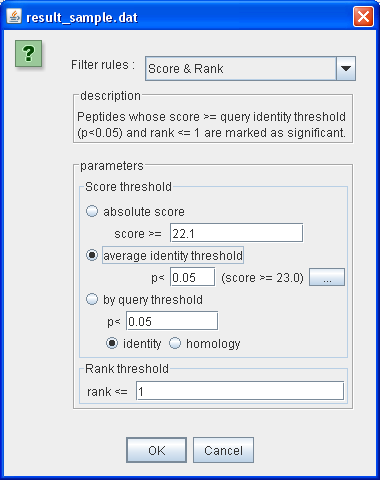
In the filter dialog, the second one, parameters specified are used to classify PSM (Peptide Spectra Matches) to significants, duplicated or ambiguous groups.
Select Score and Rank filter with the following values :
- Score threshold
- average identity threshold with a p value < 0.05 (click on '…' button to refresh corresponding score value, should be 23)
- rank threshold = 1
Step 4 : Result validation
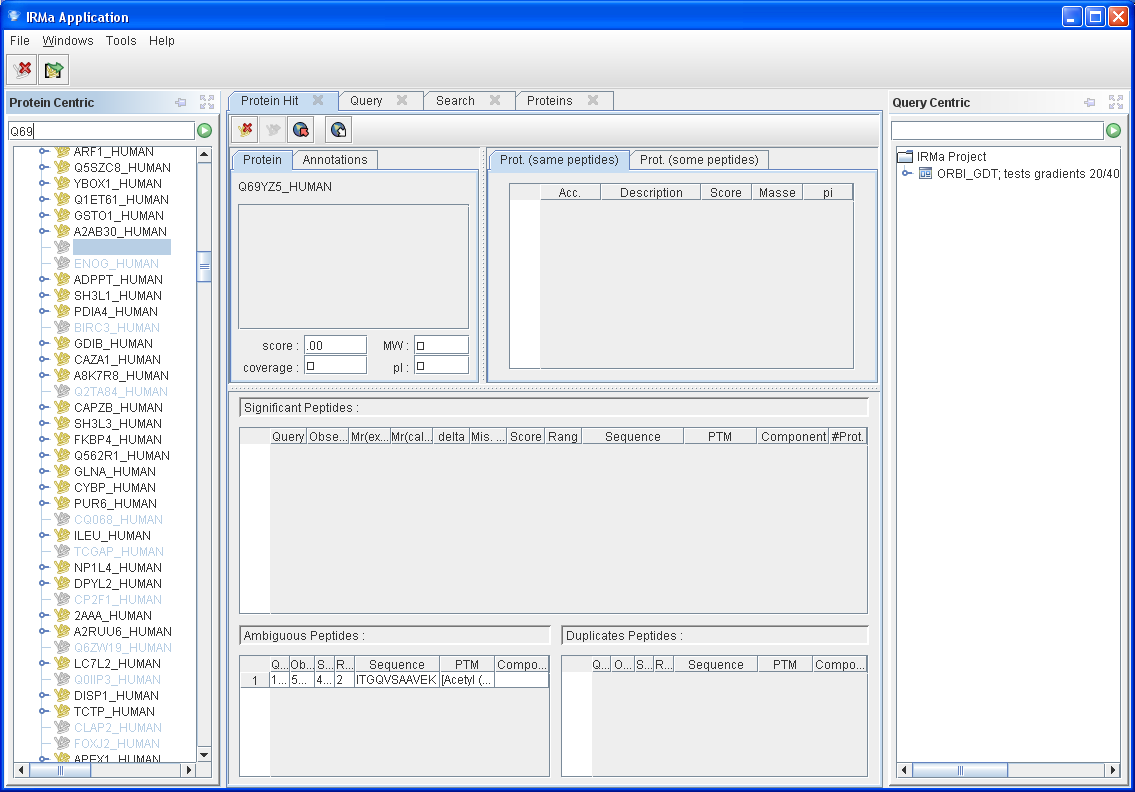
From Protein Centric Navigation Panel, you can select any identified protein hit to view its property (see User Guide Description… )
)
They can be identified in the Protein Centric Navigation Panel, they are grayed
For example,
- Enter Q69 in search text box
- Protein Q69Y75_HUMAN will be selected. This protein only have 1 peptide in ambiguous group.
- Double click on peptide, this will select Query tab for query # 170
- Select match # 2 witch is the one associated to Protein Q69Y75_HUMAN.
Same sequence and PTMs that specified in Protein Hit Tab or You can view this in Query Centric navigation panel : Go to query # 170, expand it. And look under matched to see associated proteins
- right click on this second line (or enter “v” after selecting the line) to view the Plot and Table for this PSM.
To delete a “false identified” Protein Hit :
- Select the protein hit : Q69Y75_HUMAN
- In Protein Hit Tab, clik on first icon : <IMG>
It is also possible to delete all protein hits with no relevant peptides by clicking on <IMG_ALL_DEL> in general toolbox.
Step 5 : Export validated result
Once validated, the identification result can be exported into various formats. Click File –>Export –> Identification result –> to Excel. Choose the name of the file that will be generated and click Save


